
The Interventions page allows you to evaluate, compare, and manage decarbonization measures across your portfolio. It combines intervention configuration tools with interactive analysis capabilities, including a heat map and advanced filtering.
From this page, you can tailor interventions to your portfolio, assess their performance across buildings, and segment results based on both intervention-level and building-level criteria.
To access Interventions, click Interventions on the sidebar. This opens the Interventions dashboard.
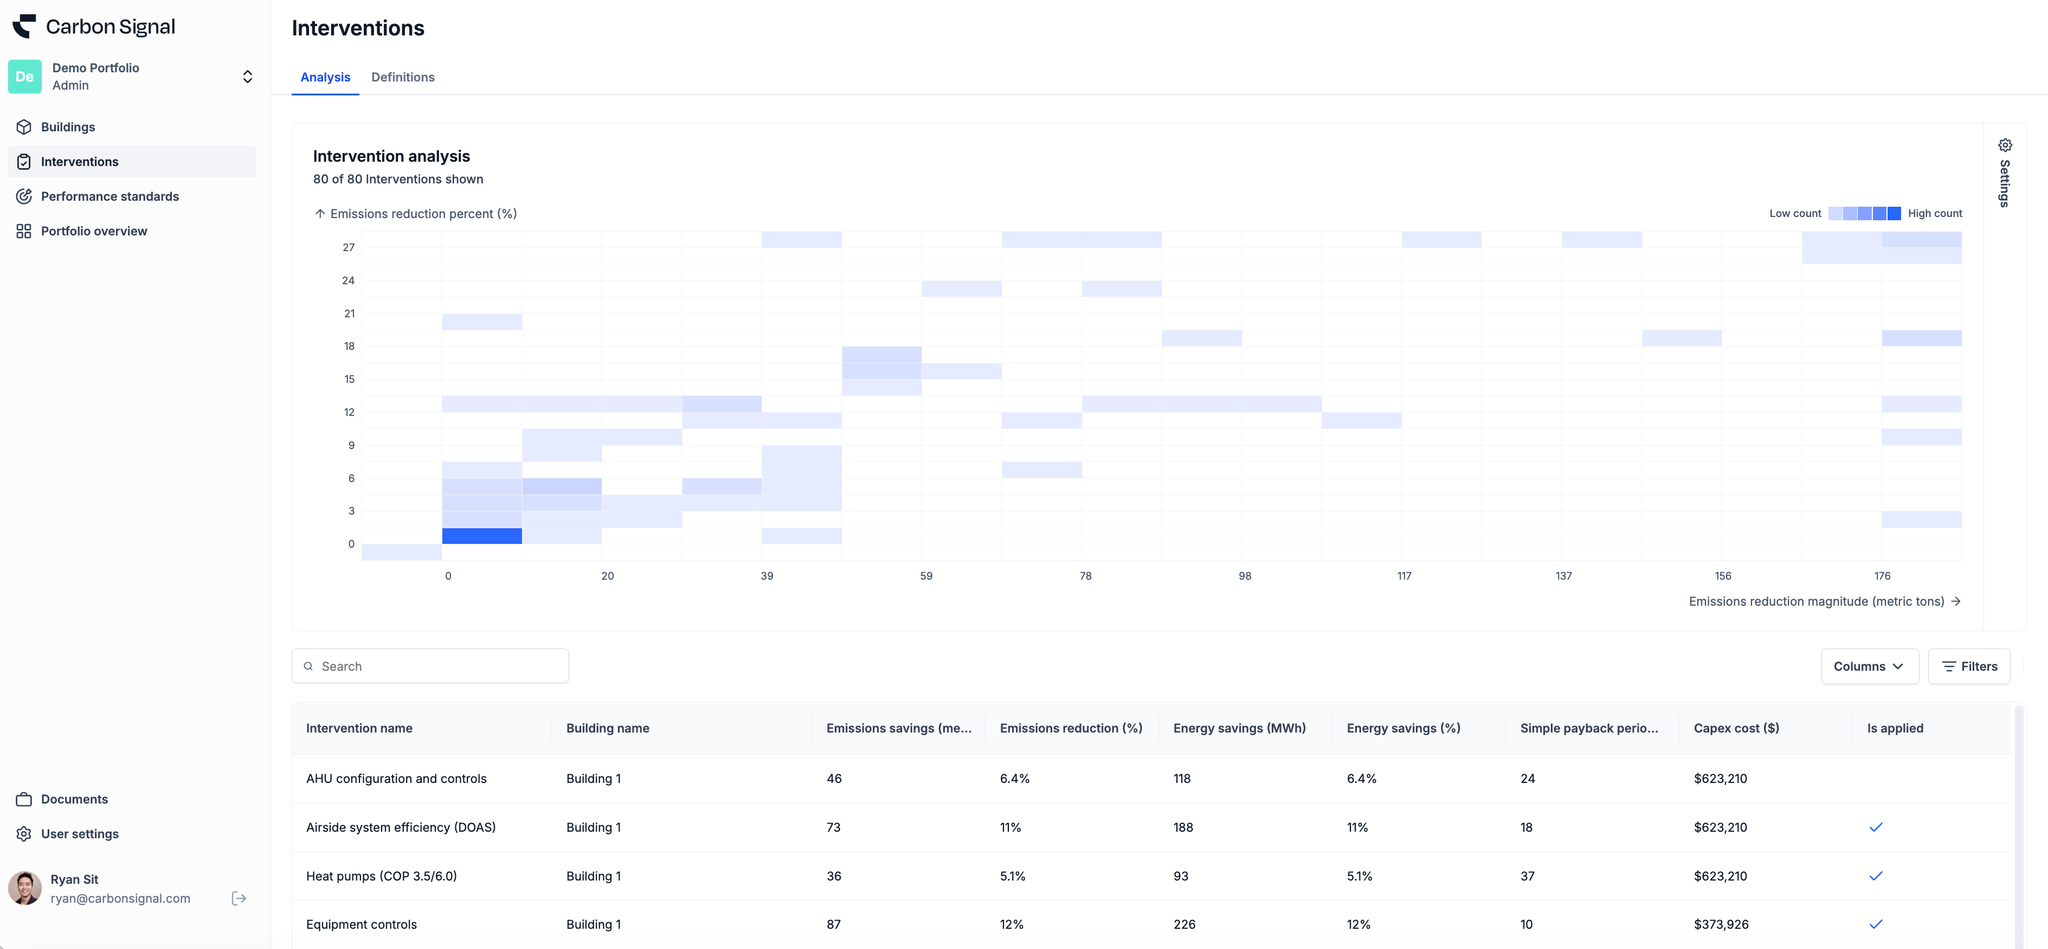
The Interventions page includes two primary sections:
- Analysis – Visualize and compare intervention performance across buildings.
- Definitions – Create, edit, and manage intervention assumptions.
You can switch between these views using the tabs at the top of the page.
Definitions
The Definitions tab is where intervention configuration occurs.
From this view, you can:
- View all current interventions being modeled.
- See which model parameters are impacted.
- Review the default cost of each intervention.
- See whether the intervention is set to preserve baseline performance (i.e. only apply the intervention if it improves baseline energy performance).
- Create and edit Custom Interventions.
This tab controls how interventions are defined and applied across the portfolio.
Creating a New Custom Intervention
Click Add intervention, then select Custom intervention to launch the wizard. The other option, Add from library, pulls in a predefined intervention from the shared library instead.
Step 1: General
Provide the basic details:
- Intervention type: what kind of intervention this is. The second and third steps change to match the type you pick.
- Name of the intervention.
- Type of intervention: one or more category tags. At least one is required for a retrofit, and Next stays disabled until you select one.
- Description: a short note documenting the purpose or technical assumptions behind the intervention. This is helpful for team members reviewing or editing the intervention later.
There are no cost fields on this step. All of the financial inputs are on step 3.
Click Next → to proceed.
Step 2: Model Parameters
Here, you define the technical adjustments for the intervention.
You may optionally select or unselect Preserve baseline performance.
- If selected: the target values defined for this intervention will only be applied when they improve a building’s baseline conditions.
- If unselected: the intervention will be applied regardless of whether it worsens baseline conditions.
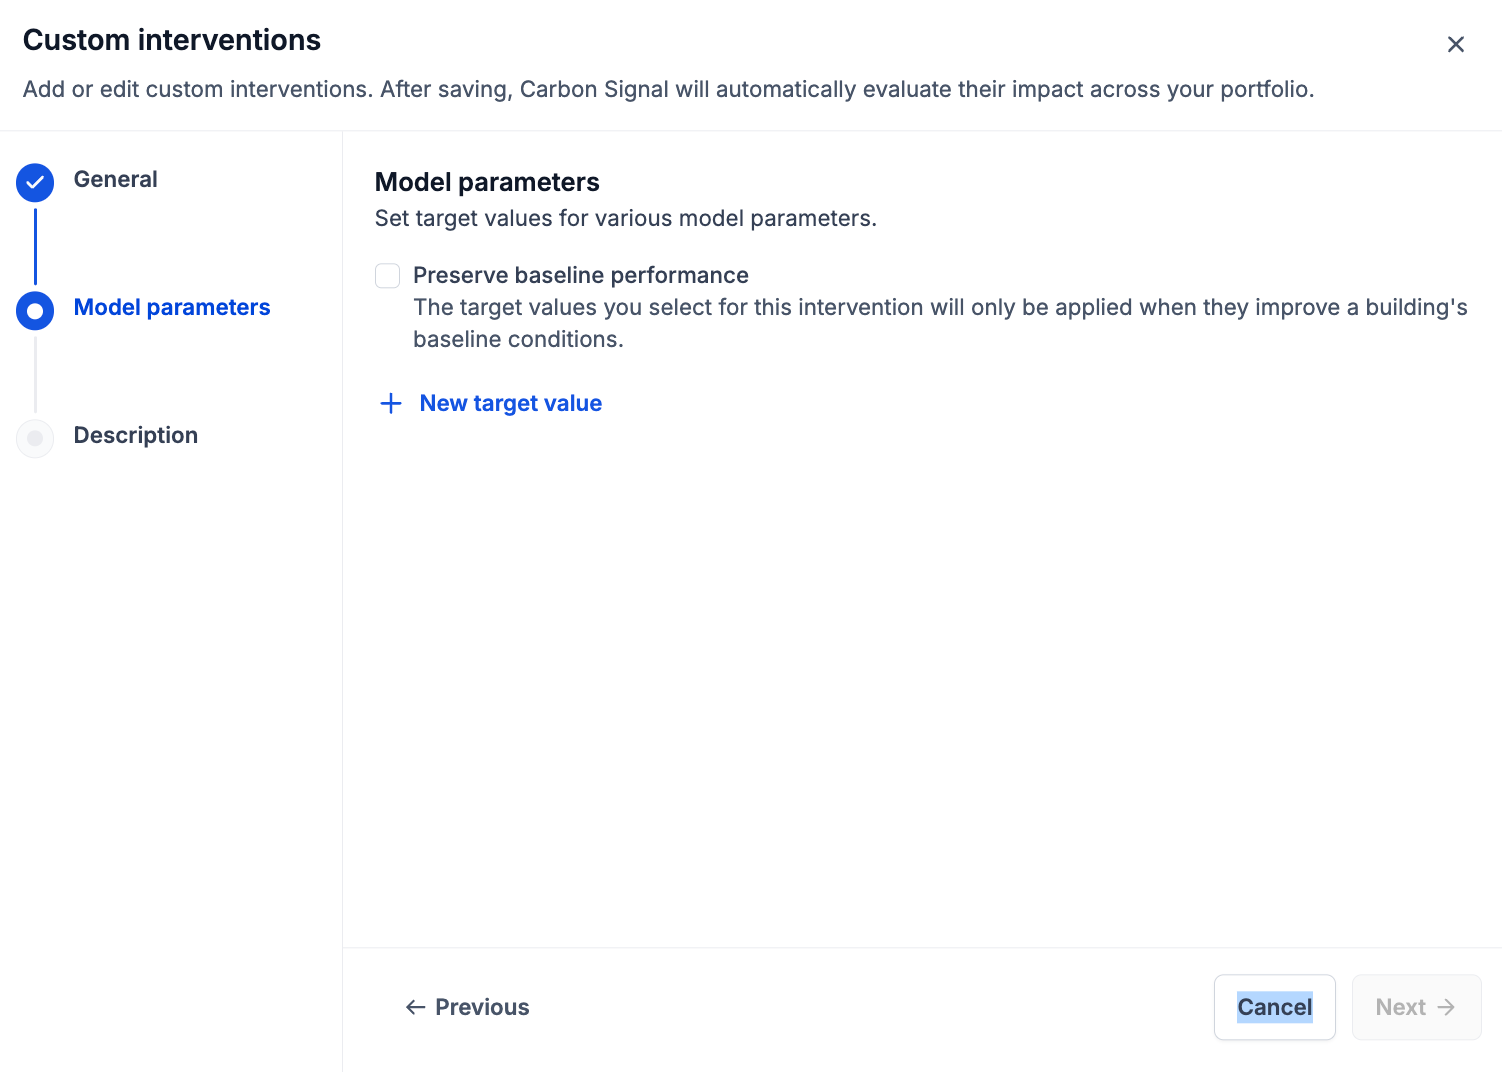
To modify target values:
- Click + New target value.
- Select the model parameter you would like to adjust.
- Choose the appropriate action.
- Enter the target value or adjustment.
- Repeat as needed for additional parameters. You can define multiple target values within a single intervention.
You can set target values for a wide range of model parameters, including:
- Envelope & Infiltration: Wall assembly R-value, Roof assembly R-value, Window assembly U-value, Window SHGC, Infiltration rate
- Lighting & Equipment: Lighting power density, Equipment power density
- Schedules: Lighting, Equipment, HVAC, Heating/Cooling setpoints, Ventilation
- Mechanical Systems: Heating/Cooling systems, Fan pressure drop, Economizer, Maximum humidity level, Heat recovery effectiveness, Ventilation rate, Fan minimum turndown, Supply air reset
Each parameter supports different Actions, such as:
- “Set Value to” – Assign a specific value
- “Percent” – Increase or decrease by a percentage
- “Shift” – Adjust a numeric value up or down
- “Substitute” – Replace a schedule based on its current (baseline) condition
Example: Increase Wall Assembly R-value by R-5
- Click New target value
- In the dropdown menu, select “Wall assembly R-value”
- For Action, select Shift
- For the secondary Action, choose Increase by
- Enter 5 to represent a 5-point R-value increase
Click Next → to continue.
Step 3: Intervention costs
Set the financial assumptions for the intervention. These directly influence the calculated Net Present Value and Marginal Abatement Cost results.
- Capital cost: the upfront cost. The basis is chosen from the dropdown beside the field and defaults to USD, which is a flat total for the whole intervention. The alternatives are $/ft² (floor area), $/env. ft² (envelope area), and $/win. ft² (window area). Check the basis before typing a number: entering a per-square-foot figure while the basis is still USD creates a flat cost of that many dollars.
- Change in maintenance costs: the annual change in maintenance spend after the intervention.
- Utility incentive: any rebate or incentive that offsets the capital cost.
- Service life (years): how long the intervention lasts, between 1 and 50.
Click Save and evaluate. Carbon Signal evaluates the intervention against every building in your portfolio, and the results appear in each building’s Interventions table on its Building Details page. Saving does not add the intervention to any building’s reduction pathway; use the steps below to do that.
Applying Custom Interventions to Existing Buildings
A new intervention is evaluated for every building but is not added to any building’s pathway. To place one on a building’s decarbonization timeline:
- Go to the Building Details page.
- Scroll to the Interventions table.
- Click the row for the intervention. There is no edit icon; clicking anywhere on the row opens a drawer on the right.
- Under Intervention timeline, switch on Add to pathway and set the implementation year.
- Save the drawer.
The Decarbonization over Time chart will update to reflect the newly applied intervention.
To do this for many buildings at once, select them on the Buildings page, click More actions, and choose Update reduction pathway.